|
Chris Fedderson — MacroFine Musings Kathy Lawler — Guest Blogger and Resident Color-Guru ~~~~~~~~~~~~~~~~~~~~~~~~~~~~~~~~~~ Ever wonder how to choose a great color scheme for you living space? One way is to start with one of your favorite pieces of art and choose your color scheme based on that work. It can be a painting you love or a photograph you have just purchased. Trust the Artist’s palette, the combination of colors they used and how they work together, and then with those create your own space that you love to be in. Take this beautiful image of a Chinese Elm bark. Bring these wonderful colors of Nature into your living space for an outstanding and inspired interior. Let’s take a look at the color palette you could use with this image. 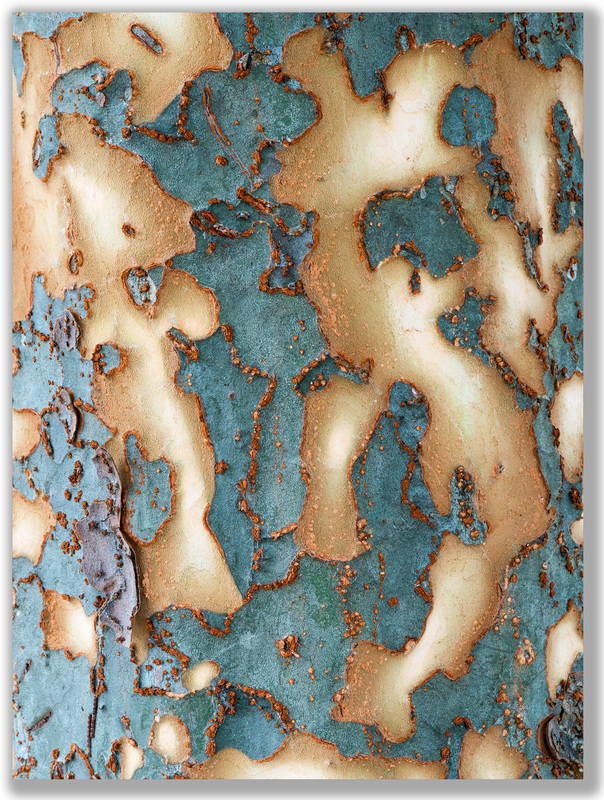 Map of a Tree First we have this luscious shade of mahogany. Pair that with the lovely turquoise and a rich pumpkin and you have a great combination. 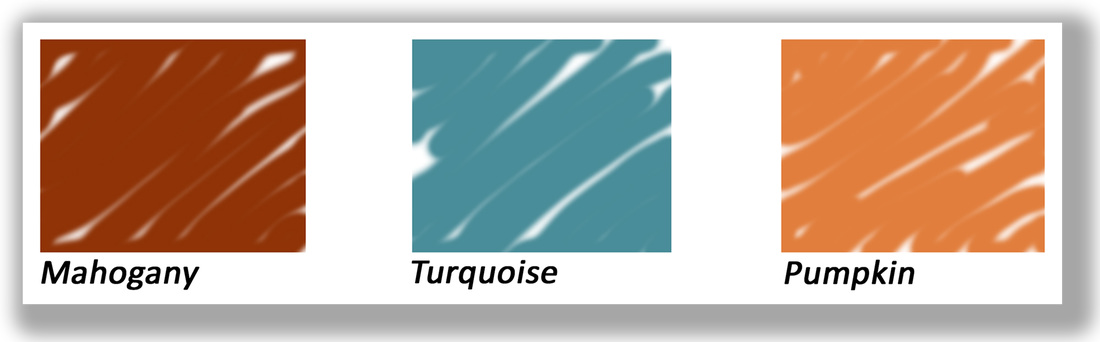 Just three of the many colors in Map of a Tree These aren’t the only colors you can pull from this palette — there are great neutrals with shades of ivory, tans, light blue, steel grays, along with reds, oranges, and whites. You can pump up the volume on the colors by using a more intense version of the shade or you can tone them down or make them lighter as well.
As discussed in a previous blog on Color, there are many approaches you can take with color combinations. Our first two choices from this palette happen to be complimentary colors and make a great basis for this color pairing. Add pumpkin and you have a great accent. One great way to work with color and give your home a sense of flow while changing up the look is to use one of the colors — the turquoise for example — as the primary color for your living room. It then becomes the secondary color in your bedroom and just the accent color in another room while other colors in your palette will become dominant colors for each of those rooms. Learn to experiment and don’t be afraid of color! Color can set a mood in your home — your bedroom can be done in restful shades of blues for a calming effect or you can add some color zing to your kitchen for a bright energetic space. You can make a room appear bigger, cozier, more restful, or more cheery depending on your color selections. Even small amounts of accent colors bring life into a space. There are several ways to experiment with color. I do recommend experimenting with painting your walls, using throw pillows, adding new art and accessories that can be relatively inexpensive upgrades and are easy to change. Thank you for visiting… and remember to color outside the lines! — Kathy P.s. See our Change of Art blog for additional color ideas for your home.
2 Comments
Chris Fedderson — MacroFine Musings ~~~~~~~~~~~~~~~~~~~~~~~~~~~~~~~~~~ One of the things I routinely like to photograph is tree bark. It offers such variety in texture, color, and scale. Bark is ever-changing and you can capture really great images all year long, in all kinds of weather conditions. There so much variety in bark — the peeling, the cracking, the swirling patterns, smooth and rough patches, intersecting veins, and the amazing colors when the light hits it just right.  "Map of a Tree" -- Chinese Elm I have a favorite tree that I found one year while hiking in Mason Neck State Park in Virginia. I have been revisiting this same tree for several years now.
The tree was a dual-trunked specimen and it split in two, with each half falling in opposite directions. It has been amazing to revisit this tree to view the changes, the decomposition, the fungus, and the new weathering bark and wood patterns that have developed. Now, several years later, I’m still finding new, intriguing sections to photograph. Since I always shoot macro and close-up images, another great advantage to photographing bark is that you can shoot in any wind conditions. Unheard of for macro! (If that bark is waving in the wind then you’ve got bigger problems than just getting a great shot!) Here are a few tips and things for you to try when photographing bark.
Speaking of all things bark — this month at the Workhouse Art Center you can see my un-official showing All About the Bark. I have images of: Chinese Elm, River Birch, Royal Palm, the afore-mentioned fallen tree, and more. Hope you drop by for a visit, now through October 2nd. Thank You for visiting, — Chris P.s. What’s your favorite subject matter? Why do you find this subject to be so interesting? What difficulties to shooting does it present? Share with us, we’d love to hear about your experiences. Chris Fedderson — MacroFine Musings ~~~~~~~~~~~~~~~~~~~~~~~~~~~~~~~~~~ Do I ever have a photo challenge for you! Bubbles! I recently experimented with trying to photograph bubbles. Not the kind found in champagne or beer, although that might be fun too, but the kind you used to have so much fun blowing, watching, and chasing as a kid. 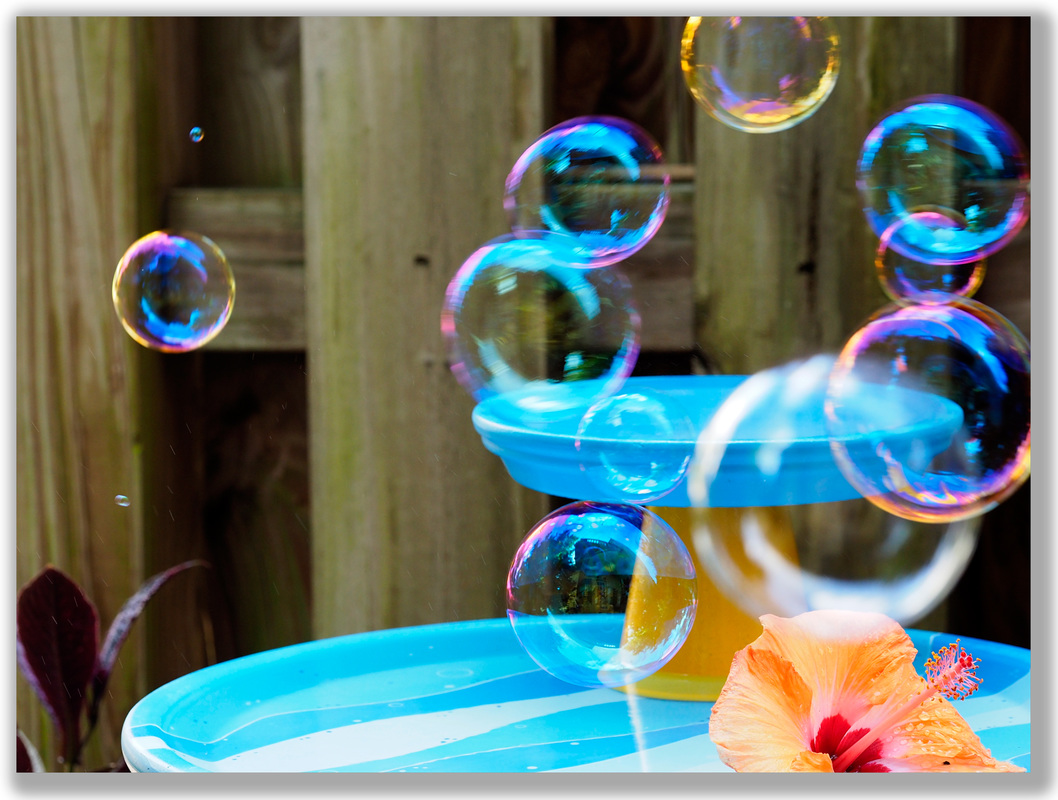 Life Is Bubble-icious! An interesting thing about the experiment was that it presented about every possible photographic challenge you could think of:
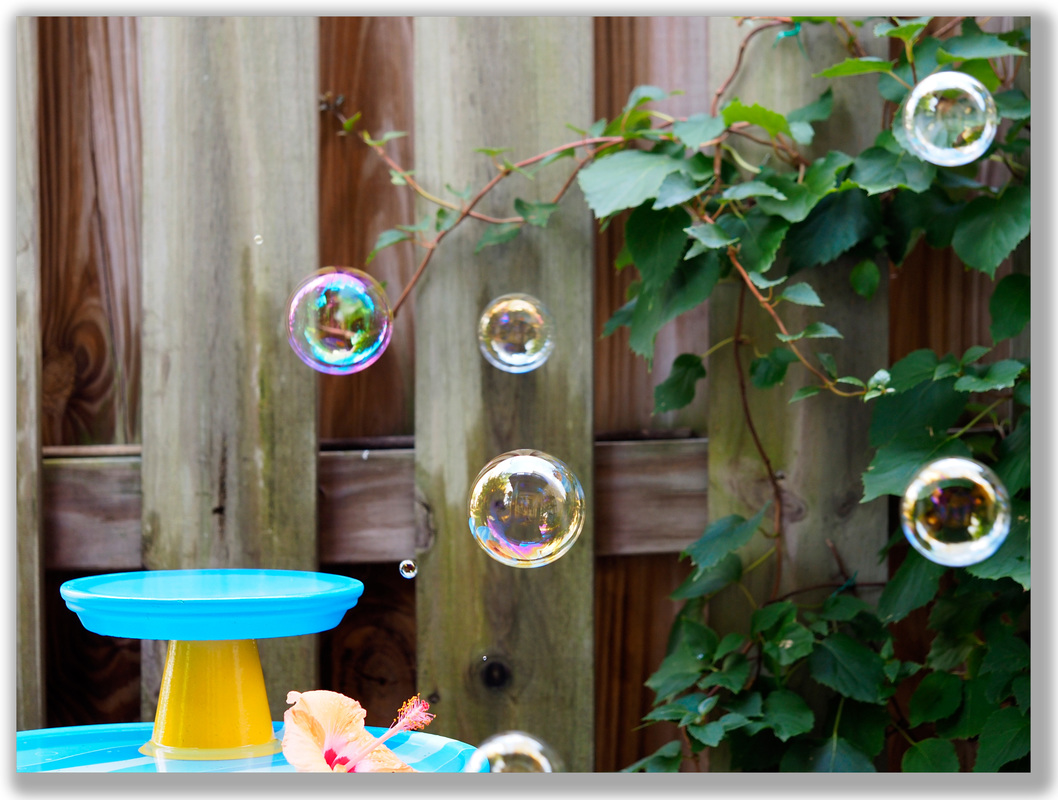 . . . And Bubble-icious-er!! For me, this was actually an experiment in seeing what my new camera would do on some of the automatic settings. I rarely use them but it is always good to know what your camera does when left to its own devises; for that moment when a hummingbird flies up and you don’t have time to do much in the way controlling your settings.
You also don’t want your camera's settings to ruin a great opportunity, so you should learn what can happen. For example, while on auto, the ISO on my camera sometimes went to some ridiculous number and if I had captured something good, I likely wouldn’t be able to print it due to the noise/grain in the image. One caution: this is a messy, messy challenge — you’re going to get soap everywhere, so don’t try this challenge indoors! Also, you’ll need an assistant — someone to blow the bubbles — and to clean up afterward! Thank You for visiting, — Chris P.s. So how did your bubbles turn out? I'd love to hear about your experience. Chris Fedderson — MacroFine Musings Kathy Lawler — Guest Blogger ~~~~~~~~~~~~~~~~~~~~~~~~~~~~~~~~~~ While watering our flowers, specifically our Hellebores, I noticed that some of the leaves were getting wrinkled, curled, and yellow. Since we don’t use pesticides in the garden area, we do expect that we will, from time to time, have plants that have been munched on, or leaves that aren’t doing well. But this damage looked like it was more than a random act of a few bad leaves. Upon closer look, I found Aphids on our plant. Ugh. I also found aphids on our Habanero Peppers growing on the second floor deck. These were easy to wash off with mild household detergent and water — the plants were small and are in a small pot. I wasn’t sure what to do with the Hellebores and other yard plants though, since they are much larger and in the ground, so I went in search of a solution . . . 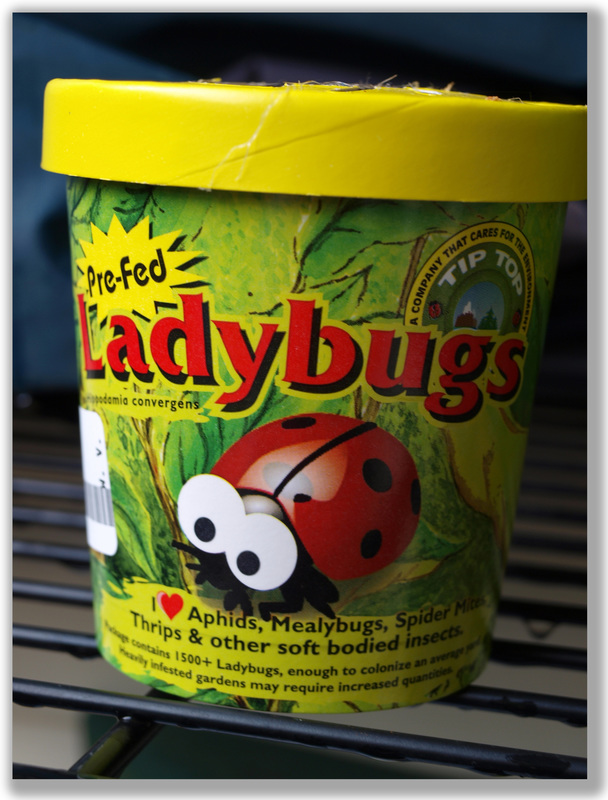 TaDaaa! Our Solution! Turns out the Nursery near our house carries containers of Ladybugs (and Praying Mantids) to help one in combating aphids and mealy bugs and other soft-bodied insects! We thought this would be a great solution and Chris would also be able to shoot a few new images of one of his favorite subjects. Chris took this beautiful image when several of our new ladybugs on landed one of our annuals, an Osteospermum, called Blue-Eyed Beauty. As you can see from the image the flowers are yellow, white, and purple with a blue eye in the center. The contrast with the flower and the color of the ladybugs is a spectacular color-combination to photograph; we touched on this in our blog post, Color Me Confused. 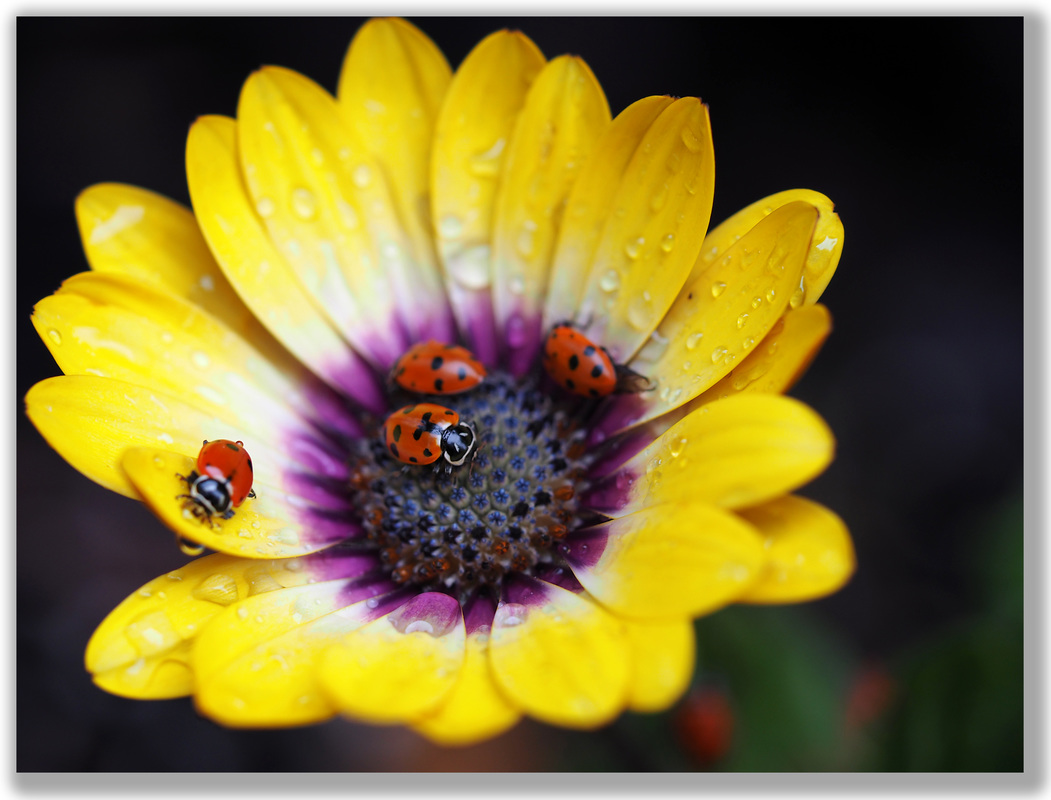 Look Ma! No Aphids! But back to our aphid issue! There are a variety of natural solutions you can try when combating Aphids. You will be happy to know that the addition of Ladybugs did the trick in our garden. The Ladybugs won the SmackDown and our garden is back in balance. Thank You for visiting, — Kathy P.s. How do you get rid of garden pests? Share your organic methods with us and our readers. |
Categories
All

About Chris
I am a Virginia-based photographer and gather my images while hiking in parks and natural areas here at home and in the locations I travel to. I also love to visit arboretums and botanic gardens to find unusual and exotic subjects. Archives
March 2017
|
 RSS Feed