|
Chris Fedderson — MacroFine Musings ~~~~~~~~~~~~~~~~~~~~~~~~~~~~~~~~~~ Gardening is how I relax. It’s another form of creating and playing with colors. — Oscar de la Renta One of our local botanic gardens — Green Spring Gardens, in Alexandria, VA — has a really fun element incorporated into their vegetable garden. An element so fun we decided to incorporate it into our own yard at home. In a nutshell, it involves short sections of corrugated drain pipe of various diameters, painted fun, bright colors, and ‘planted’ in the ground as plant pots with fun plant specimens growing in them. 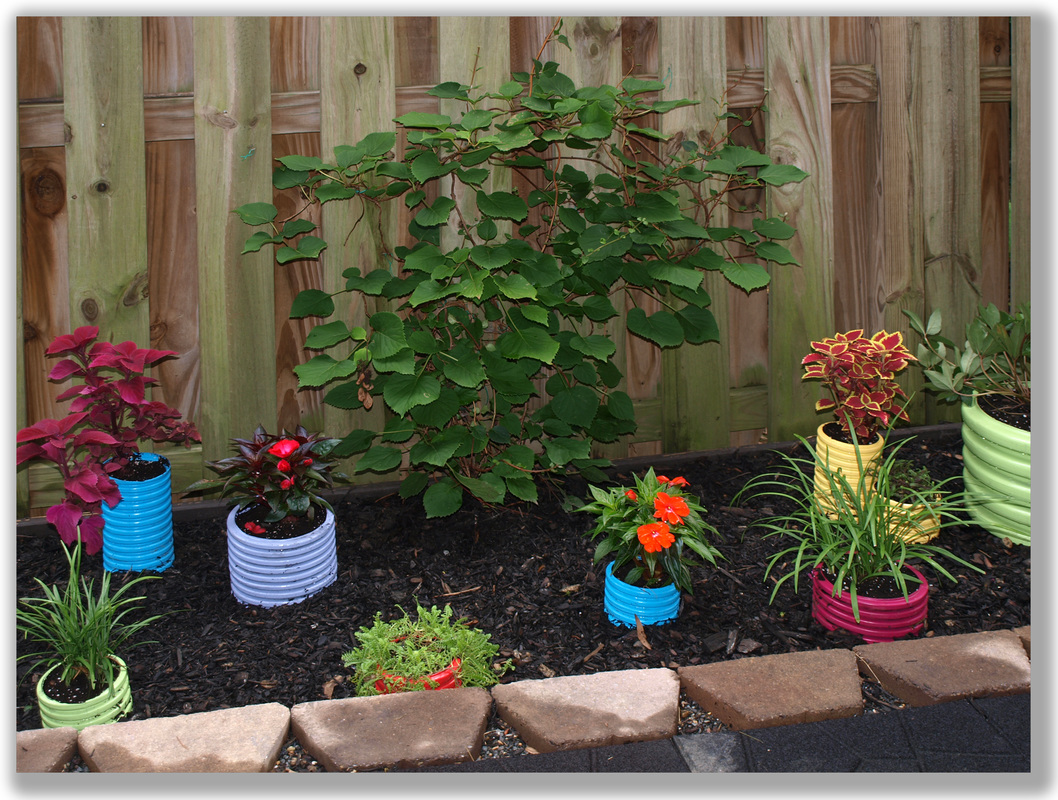 A Section Of Our Yard With Our Fun Colorful Planters  Our Pots Of Various Sizes And Colors Our Pots Of Various Sizes And Colors This was a really fun project to do. The planning and visualization. The painting of the pipe sections. The actual installation and planting. My Inner-Scavenger even enjoyed the finding of the pipe scraps we could get for free. I got some — about 40 feet worth! — from a neighbor who was doing a complete yard re-do. I got some larger diameters from the superintendent overseeing a huge highway project in town. So fear not. Get out there and scav some materials! Cut them into various lengths using a regular hand saw. Use a coarse file, rasp, or very coarse sandpaper to smooth out the cut on one end; never mind the other end, it will be buried about 2-3 inches. I would suggest having lengths of about 6, 8, 10, 12 inches, intending for 2-3 inches of each to be buried. 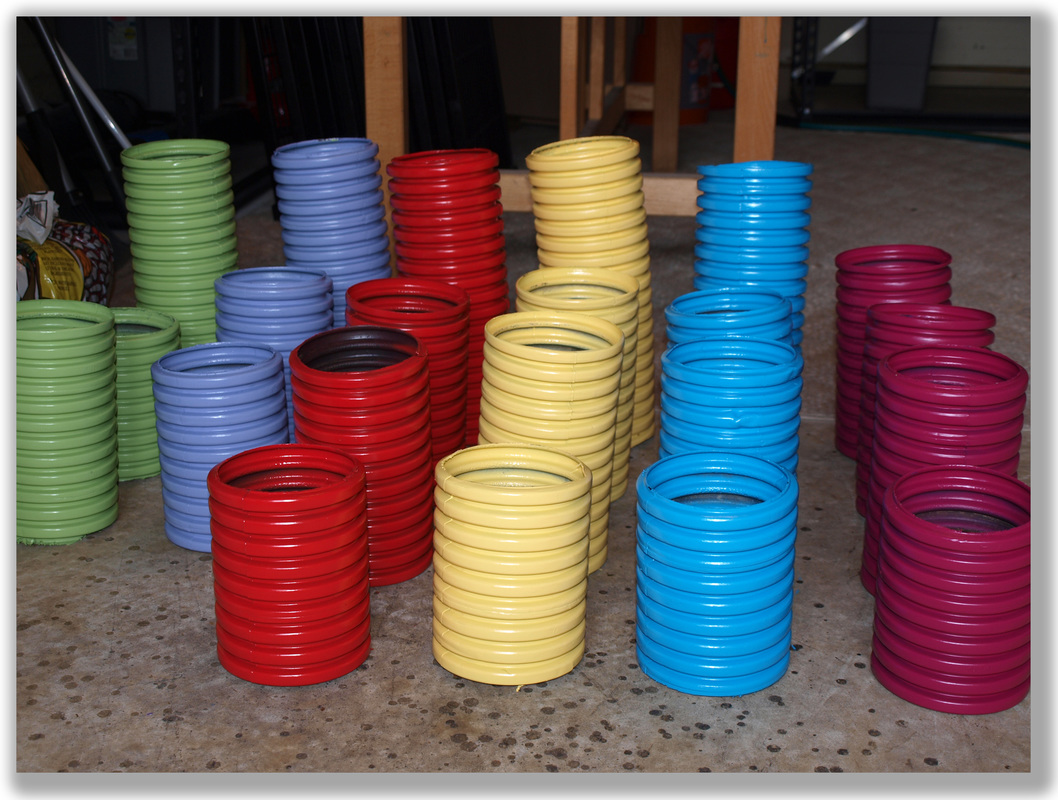 Our Pots Of Various Sizes And Colors Our Pots Of Various Sizes And Colors To clean these, wash them in detergent to remove any soil or other obvious gradoo. Then you might scrub the outside with medium sandpaper or steel wool to roughen the surface for better paint adhesion. We didn’t do this and we have a few small areas where the paint is scratched off. Now wash them in a solvent such as denatured alcohol or paint thinner to remove any residual oils or grease. 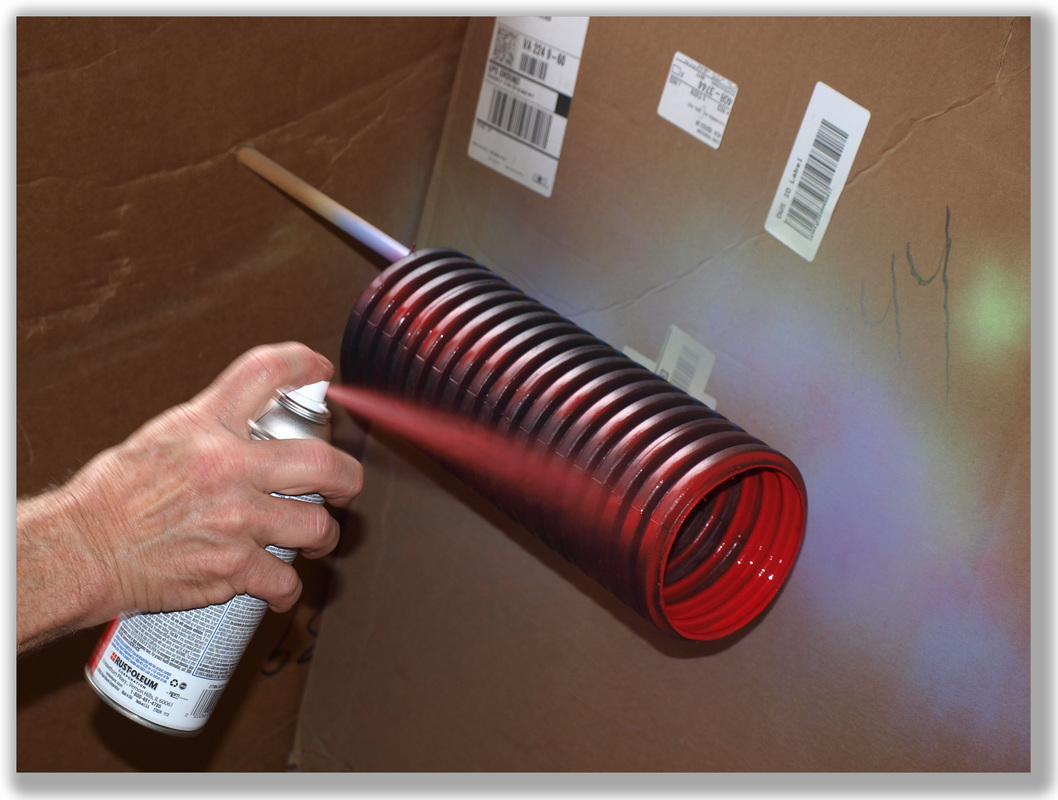 Spray Painting The Garden Planter Pots Spray Painting The Garden Planter Pots And they’re ready for paint! Use a spray paint that is intended for plastic; we used Rust-oleum. Spray inside the top lip an inch or so and over the outside, being sure to get up and down in the ‘inside’ parts of the outside corrugation. Mix it up. Be random. Paint various colors of various diameter pieces and various lengths. 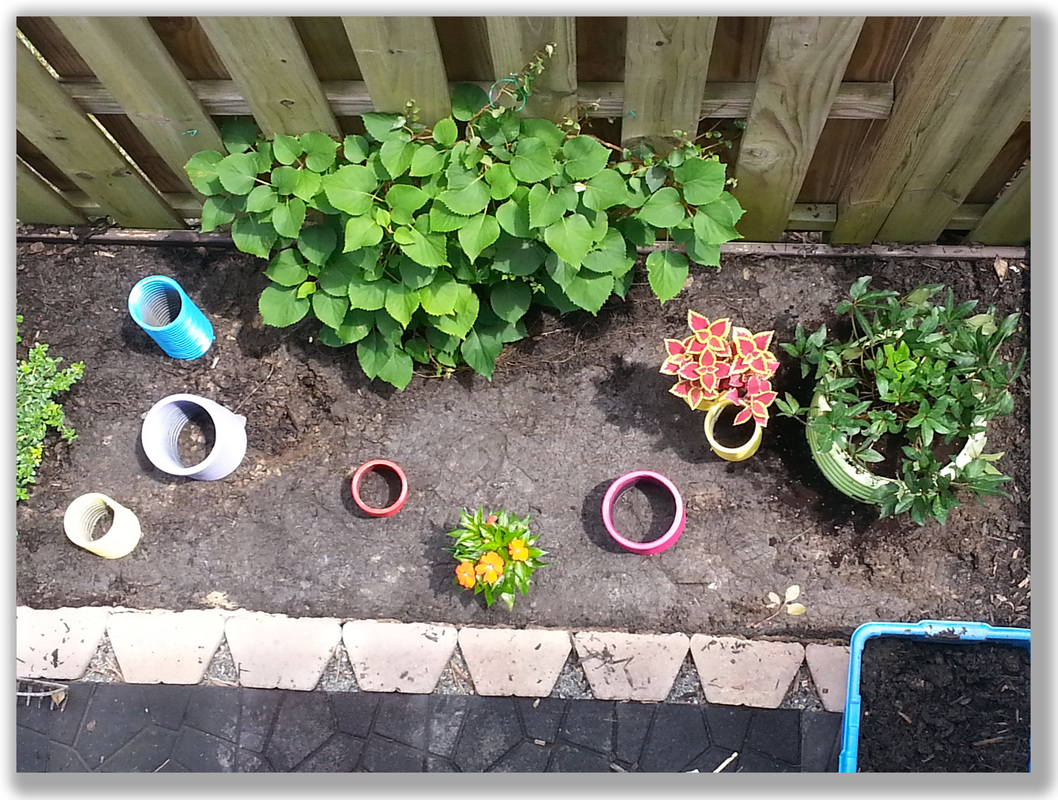 Don't Forget The Top View! Don't Forget The Top View! Now the really fun part begins! Arrange them in your yard. Try to be as random as possible while still keeping in mind that taller plants — probably in the larger diameter pots — will be in back and yet pot sizes and colors still need to be mixed up. If you have an upper deck or balcony overlooking your planter bed, consider the view from above also, when arranging your pots. 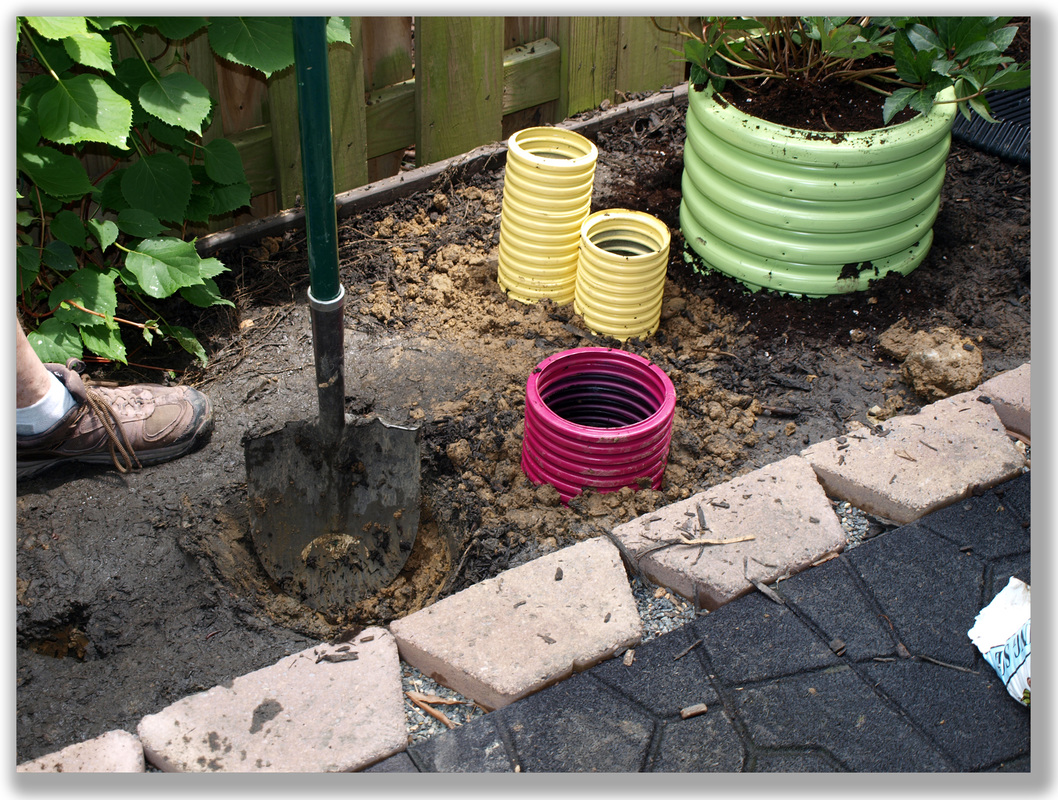 Dig A Hole To Secure Your Pot In Dig A Hole To Secure Your Pot In When you plant them, dig a hole twice as wide as your pot and twice as deep as you intend to plant it. Fill the hole half way with very coarse yard bark, mulch, or bark chips for drainage. Settle the pot in, paying attention to its natural curve, then top off the hole around the pot with dirt and pack it — very well. After all your pots are planted, take a general picture showing the overall layout including any relationships to structures, existing plants, borders, points of view, or any other factor that will affect the overall visual. You’ll use this (these) photo(s) when you go to the nursery to get plants. Get plants in sizes much smaller than your pots for ease in planting them. I suggest 2” pony packs for the 4” pots, 4” plants for the 6” and larger pots. Do the math to know how much potting mix you’ll need to fill all your pots. V = π (r 2 ) Volume = pi times (radius squared). Total up the sum for all your pots. Now, plant ‘em! Be sure to plant them down a bit from the top to allow for watering. And be sure when you fill the pots that you smoosh the potting mix into all the inside nooks and crannies of the corrugation. 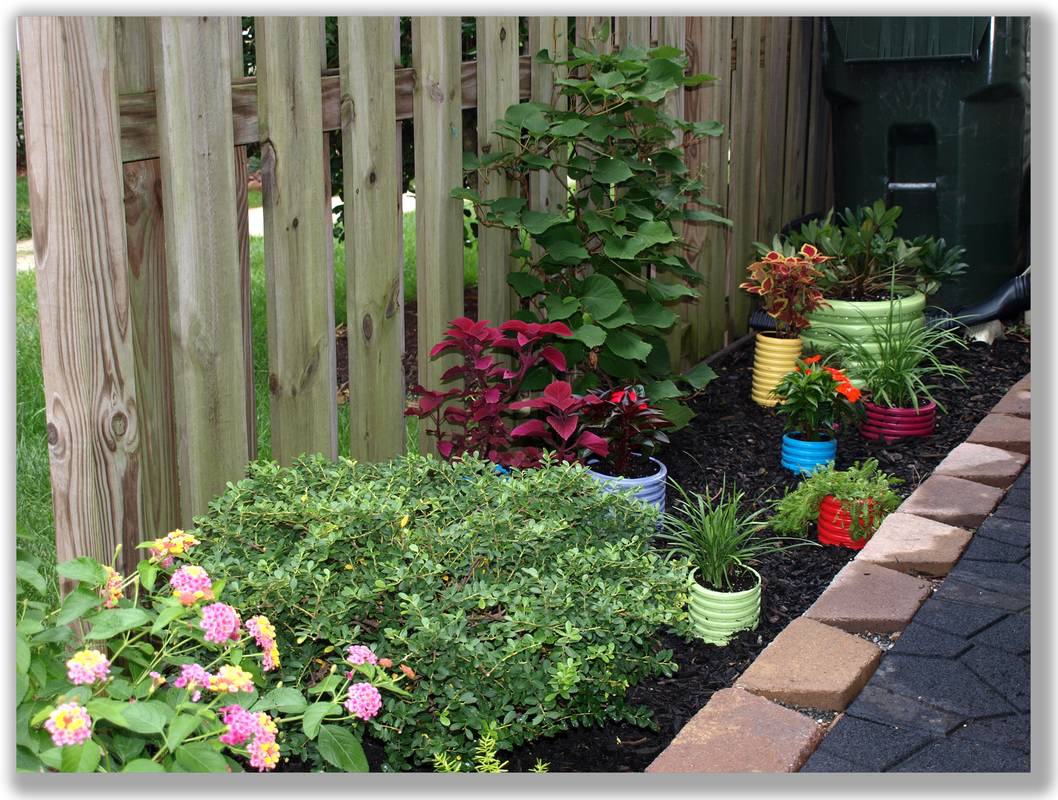 Another Finished View Of Our Back Patio Area Wasn’t that FUN?!
Thank You for visiting, — Chris P.s. How’d your project come out? What unique features did you incorporate? Where did you find sources of scrap drain pipe that others might also search out? What fun, unique plants did you use to make your garden project scream “YOU”!?
0 Comments
Leave a Reply. |
Categories
All

About Chris
I am a Virginia-based photographer and gather my images while hiking in parks and natural areas here at home and in the locations I travel to. I also love to visit arboretums and botanic gardens to find unusual and exotic subjects. Archives
March 2017
|
 RSS Feed