|
Chris Fedderson — MacroFine Musings ~~~~~~~~~~~~~~~~~~~~~~~~~~~~~~~~~~ Recently, at an Art Fair, I was talking with a couple kindergarten teachers about how I view my world prior to photographing it. I spoke of how I employ virtual tunnel-vision in my Mind’s Eye to home in on a small subject; to eliminate all the visual clutter and distractions around it; to show it in its unique singularity, unhampered by the chaos around it. In discussing this concept, we came up with a great two-part project for their students. In Part One, the class would learn about telescopes and what they have done to improve / advance civilization. The students could then “build” their own “telescopes” by coloring the outsides of TP or paper towel tubes using Crayons, markers, or finger paints (OMG!). Hey! We even managed to work Art into Science class! With Part Two comes Nature Study. The telescopes become microscopes with the Little Nature Explorers crawling around in the grass and among the bushes looking at life through their ‘scopes. A vociferous discussion soon erupts about all the colors, and bugs, and leaves, and pebbles, and worms, and…, and…, and… 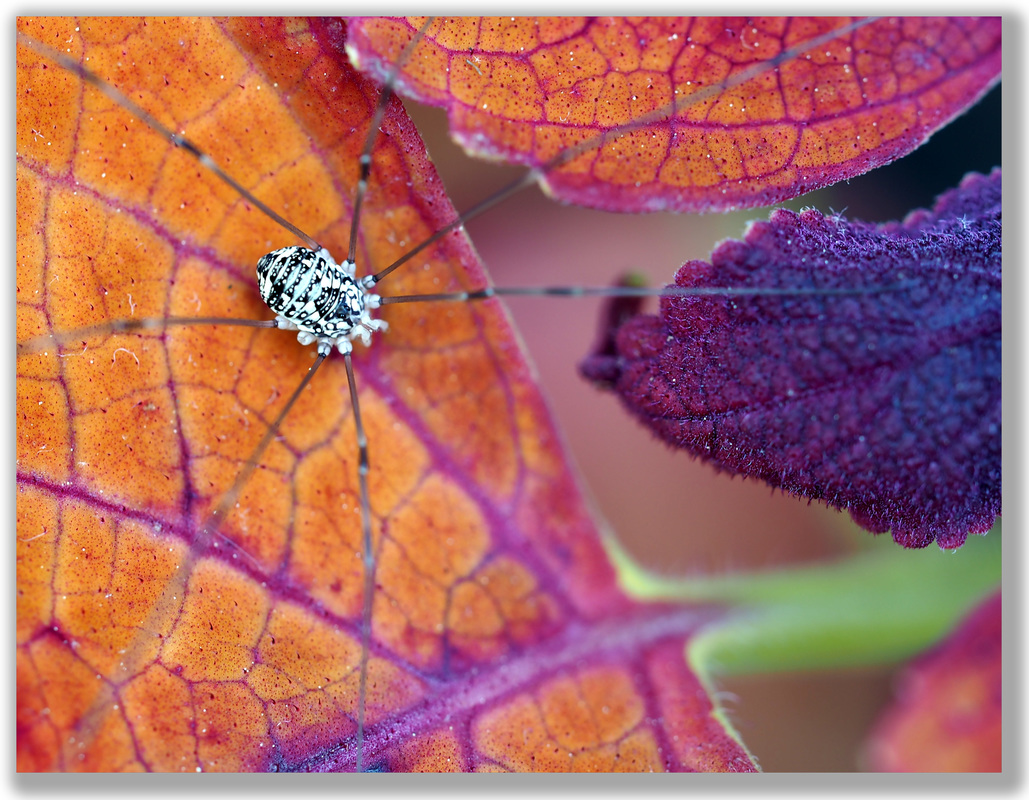 This is what I spied with my little eye. This Harvestman is about a quarter inch big... small (?) This is essentially what I do every time I go out on a Photo Safari. My TP tube is a bit more sophisticated. My voice is a bit quieter. But I’m still a kid, on my knees, rooting around in the garden, discovering the mystery, the majesty, the esoteric, the familiar [re-seen differently], the minute, the wonderful… all seemingly for the first time.
It’s Grand to be a Kid again! Thank You for visiting, — Chris P.s. Do you think you might try this with your own kids? You did?! How’d it turn out? What did they discover? Share their stories for us all to enjoy.
3 Comments
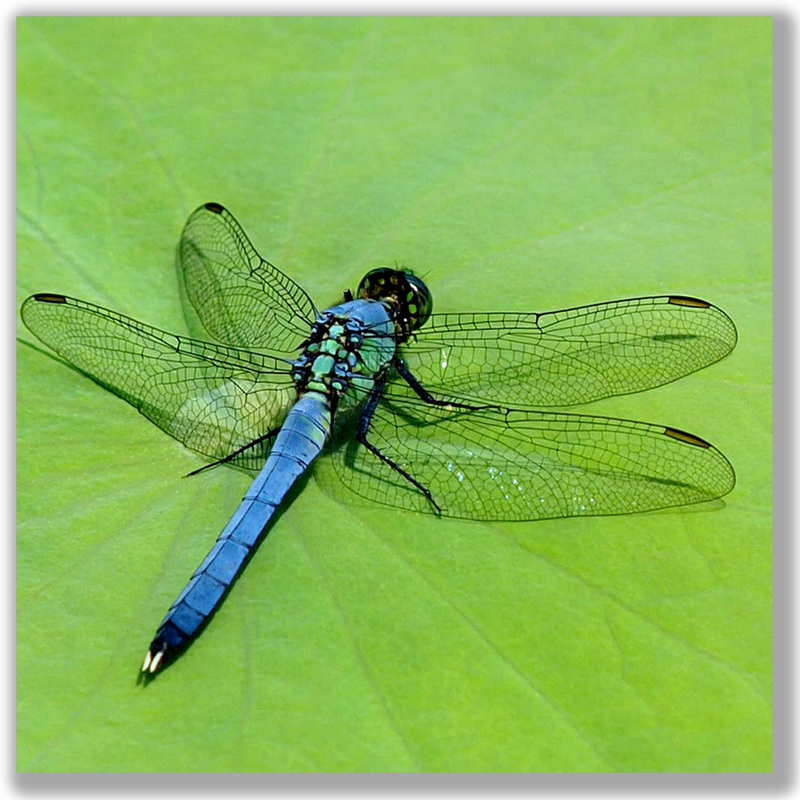
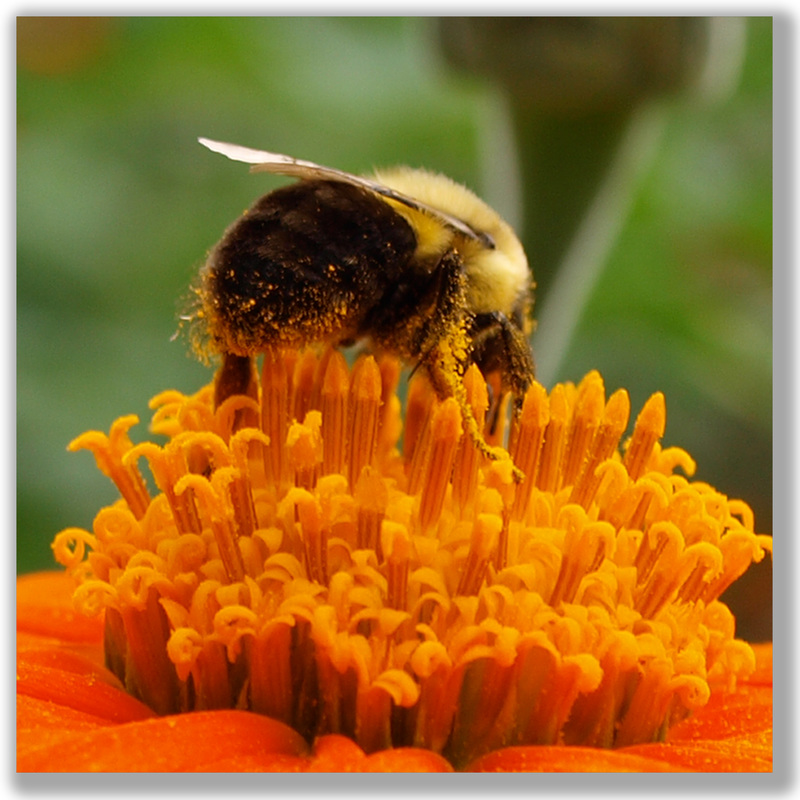
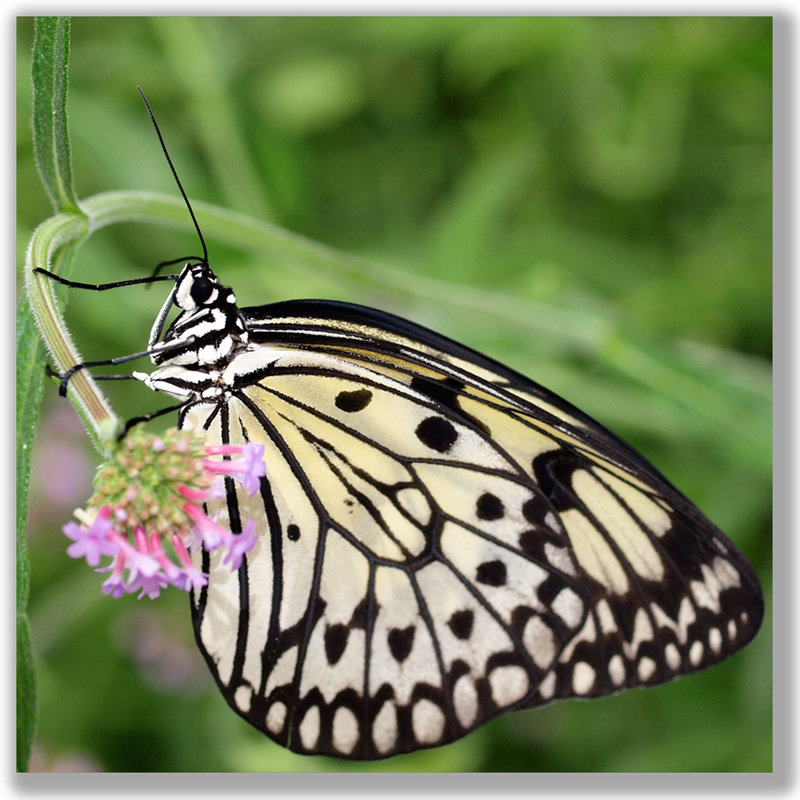
Kathy Lawler, Guest Blogger ~~~~~~~~~~~~~~~~~~~~~~~~~~~~~~~~~~ To Bee Or Not To Bee . . . Bee Good To Your Garden. We enjoyed planting a number of annuals throughout the summer last year. Since we live in the city, our yard is rather small. Between the front and the back yard together we have only 375 square feet to work with. We really enjoy the variety, sizes, and types of annuals we could chose from and of course, loved the repeated trips to our favorite nursery, Holly, Woods, and Vines in Alexandria, Virginia. Not only have we enjoyed the ever-changing color and texture combinations of the annuals we planted, but we now have a parade of little visitors who are enjoying them, too. Our plants have inspired hummingbirds, frogs, praying mantis, butterflies, moths, dragonflies, and the all-important bees — the best pollinators. Turns out, any size garden can support pollinators. Bee populations are in jeopardy and it is important to encourage their populations. We all understand the importance of bees, but the scope of the importance can’t be overstated. According to gardeners.com “one out of every three bites of your food depends on a pollinator”! Certain flowers that are nectar- and pollen-rich will help attract these pollinators. Here are a few suggestions for planting:
There is also a region by region guide to planting. You just put in your zip code and voila! You will have a PDF outlining which plants in your region the pollinators prefer. We have had several of our annuals grow a crazy amount last year and they looked wonderful. This Lantana flower, attracting both butterflies and bees, started its life with us in a 4 inch pot — now look at the size of it -- this purple pot is 12 inches across! This was grown in one of our “new pots” we created. 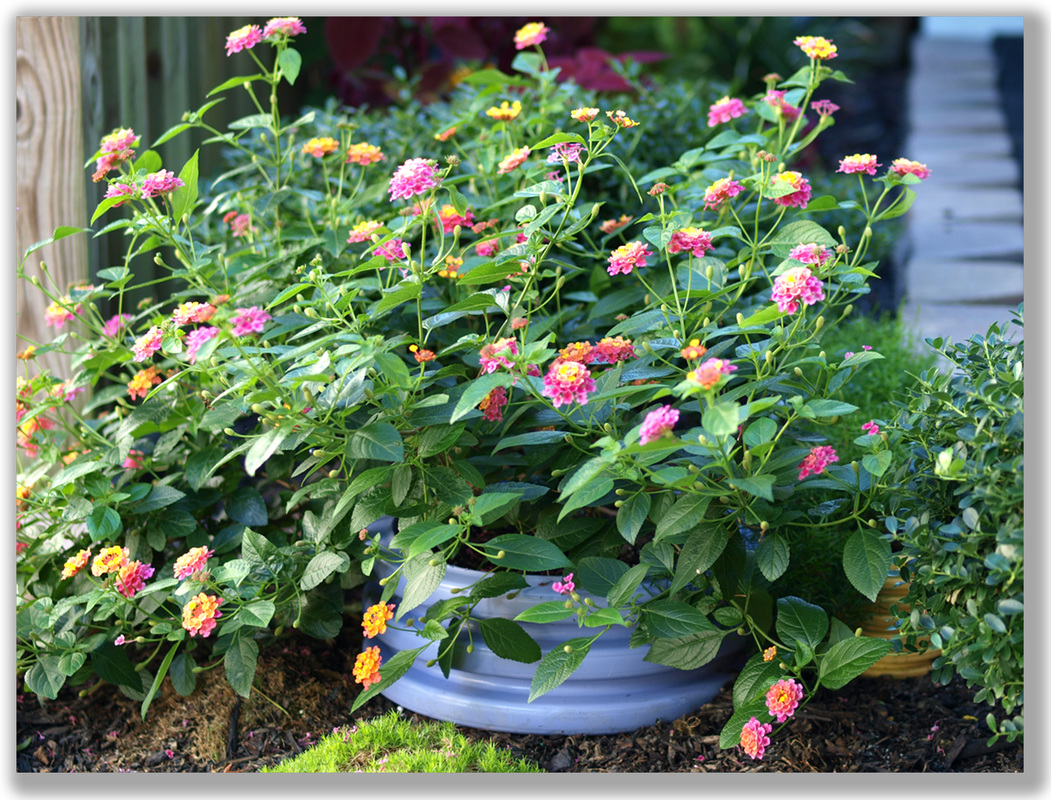 This Lantana plant went C-rrr-aaa-zzz-yy! We have been so inspired with our little garden and all our visitors, that we are making more and bigger plans for this year — we might include a vegetable garden, a water feature . . . who knows!
Stay tuned for additional BUZZ through out the year! Thank You for visiting, — Kathy Lawler, guest blogger P.s. What pollinators have you planted? What do they attract... bees... butterflies... hummingbirds...? What have you found to be the easiest to plant and propagate? Share your experiences and we'll all learn something from one and other! Chris Fedderson — MacroFine Musings ~~~~~~~~~~~~~~~~~~~~~~~~~~~~~~~~~~ Gardening is how I relax. It’s another form of creating and playing with colors. — Oscar de la Renta One of our local botanic gardens — Green Spring Gardens, in Alexandria, VA — has a really fun element incorporated into their vegetable garden. An element so fun we decided to incorporate it into our own yard at home. In a nutshell, it involves short sections of corrugated drain pipe of various diameters, painted fun, bright colors, and ‘planted’ in the ground as plant pots with fun plant specimens growing in them. 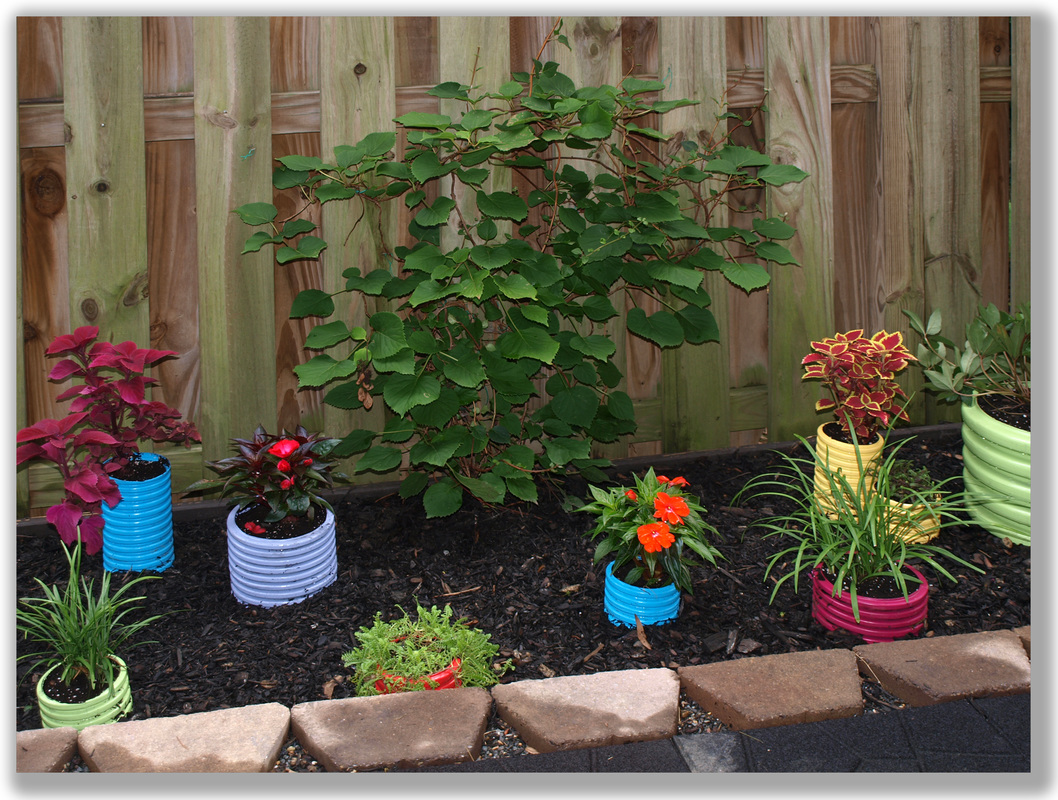 A Section Of Our Yard With Our Fun Colorful Planters  Our Pots Of Various Sizes And Colors Our Pots Of Various Sizes And Colors This was a really fun project to do. The planning and visualization. The painting of the pipe sections. The actual installation and planting. My Inner-Scavenger even enjoyed the finding of the pipe scraps we could get for free. I got some — about 40 feet worth! — from a neighbor who was doing a complete yard re-do. I got some larger diameters from the superintendent overseeing a huge highway project in town. So fear not. Get out there and scav some materials! Cut them into various lengths using a regular hand saw. Use a coarse file, rasp, or very coarse sandpaper to smooth out the cut on one end; never mind the other end, it will be buried about 2-3 inches. I would suggest having lengths of about 6, 8, 10, 12 inches, intending for 2-3 inches of each to be buried. 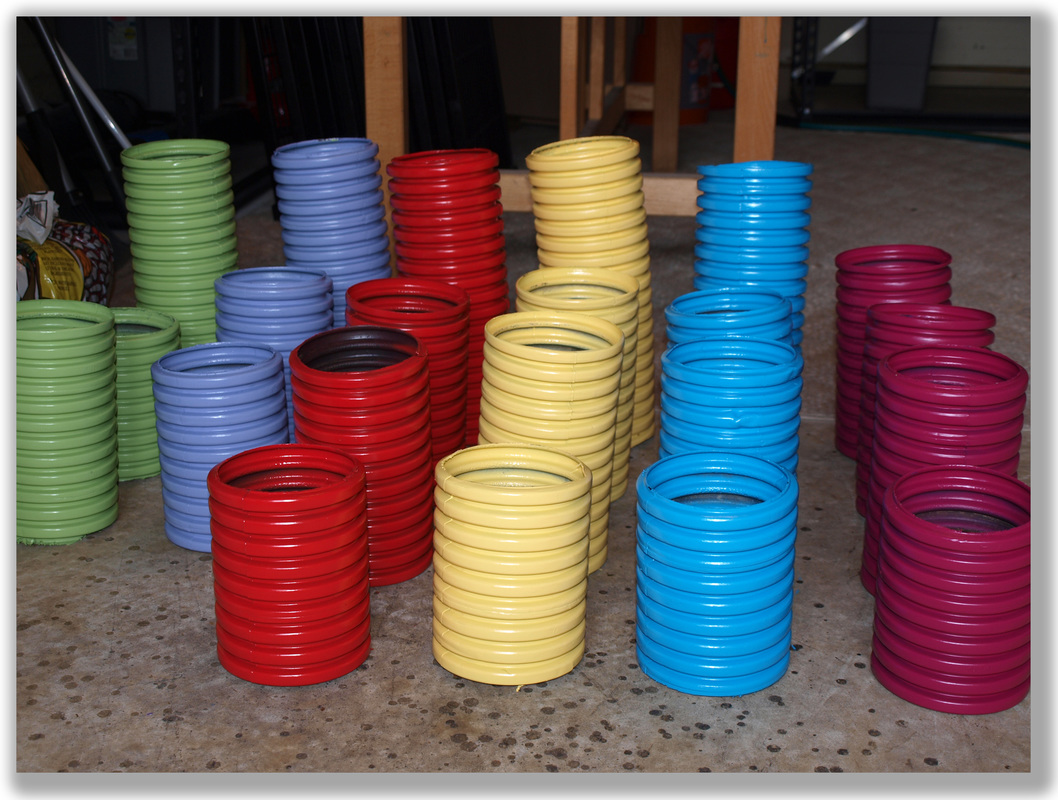 Our Pots Of Various Sizes And Colors Our Pots Of Various Sizes And Colors To clean these, wash them in detergent to remove any soil or other obvious gradoo. Then you might scrub the outside with medium sandpaper or steel wool to roughen the surface for better paint adhesion. We didn’t do this and we have a few small areas where the paint is scratched off. Now wash them in a solvent such as denatured alcohol or paint thinner to remove any residual oils or grease. 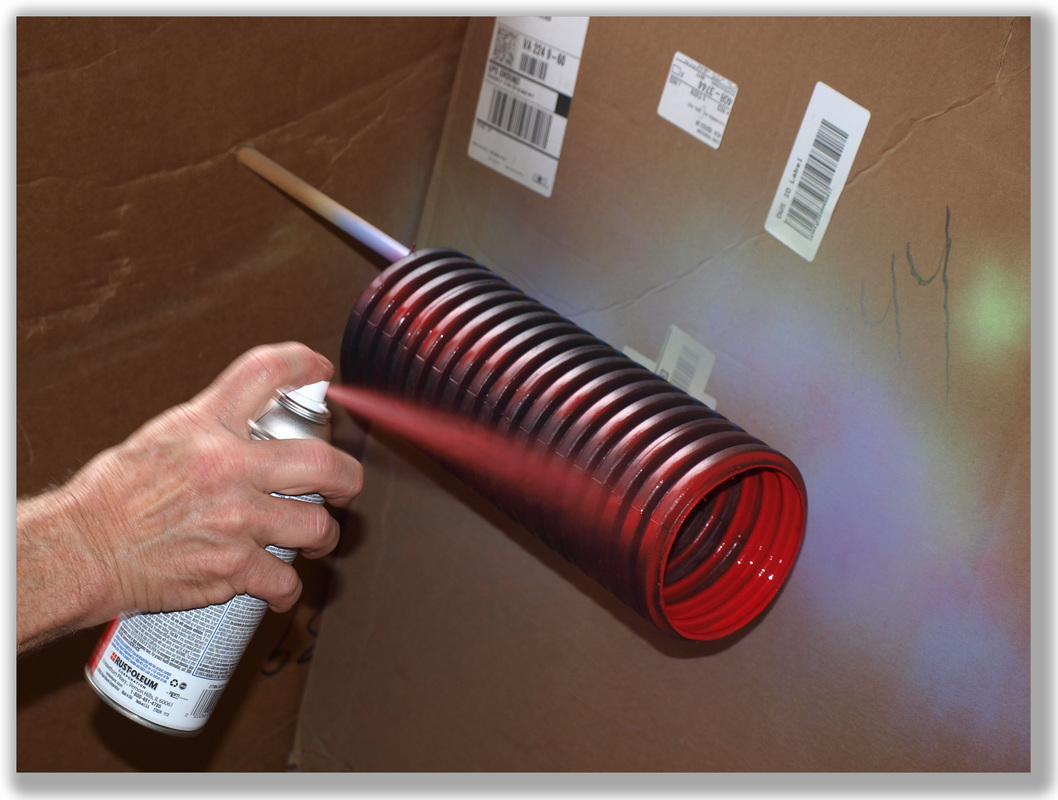 Spray Painting The Garden Planter Pots Spray Painting The Garden Planter Pots And they’re ready for paint! Use a spray paint that is intended for plastic; we used Rust-oleum. Spray inside the top lip an inch or so and over the outside, being sure to get up and down in the ‘inside’ parts of the outside corrugation. Mix it up. Be random. Paint various colors of various diameter pieces and various lengths. 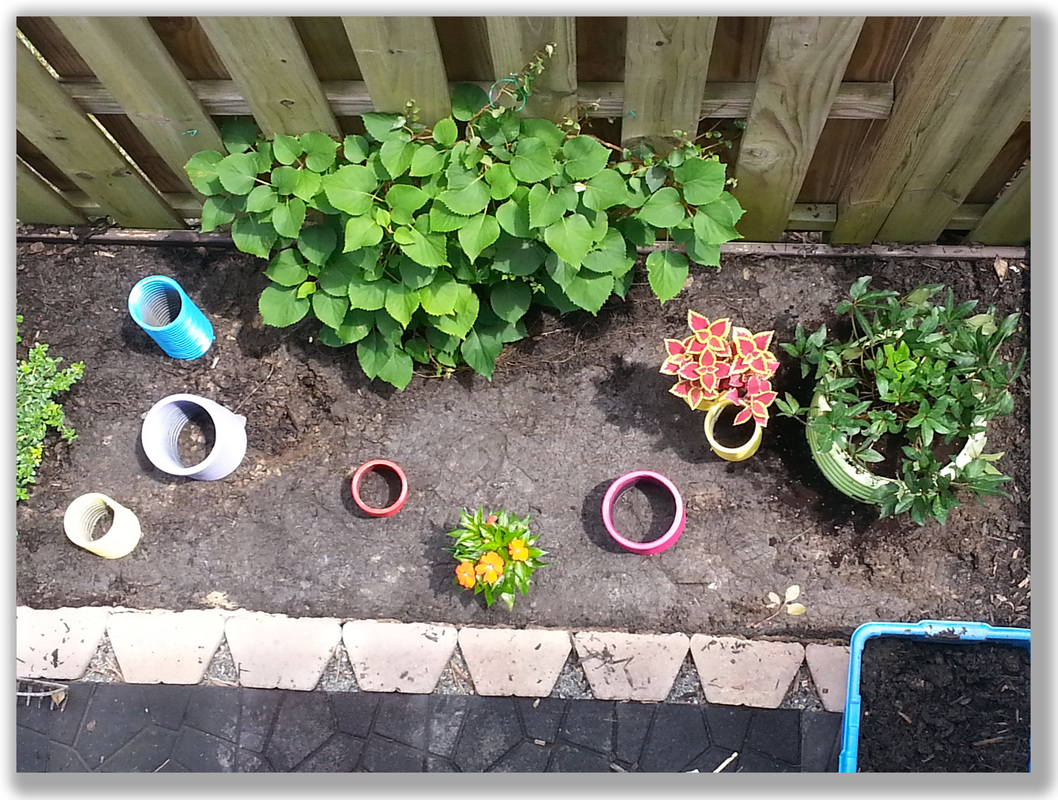 Don't Forget The Top View! Don't Forget The Top View! Now the really fun part begins! Arrange them in your yard. Try to be as random as possible while still keeping in mind that taller plants — probably in the larger diameter pots — will be in back and yet pot sizes and colors still need to be mixed up. If you have an upper deck or balcony overlooking your planter bed, consider the view from above also, when arranging your pots. 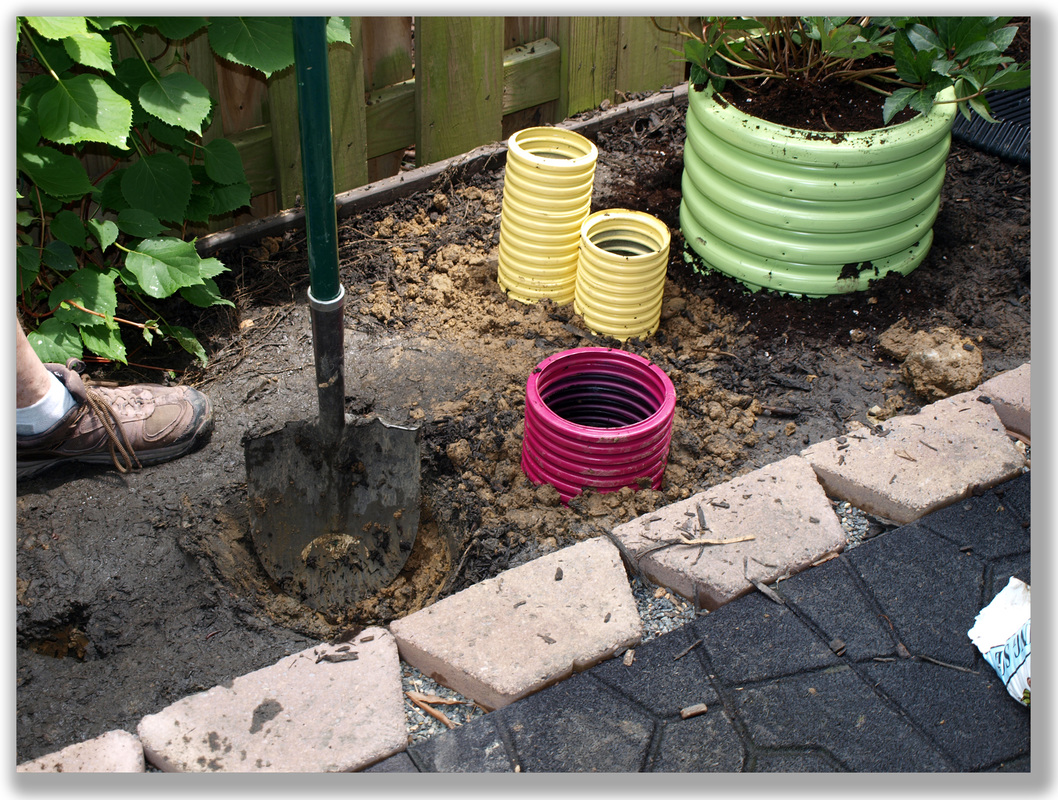 Dig A Hole To Secure Your Pot In Dig A Hole To Secure Your Pot In When you plant them, dig a hole twice as wide as your pot and twice as deep as you intend to plant it. Fill the hole half way with very coarse yard bark, mulch, or bark chips for drainage. Settle the pot in, paying attention to its natural curve, then top off the hole around the pot with dirt and pack it — very well. After all your pots are planted, take a general picture showing the overall layout including any relationships to structures, existing plants, borders, points of view, or any other factor that will affect the overall visual. You’ll use this (these) photo(s) when you go to the nursery to get plants. Get plants in sizes much smaller than your pots for ease in planting them. I suggest 2” pony packs for the 4” pots, 4” plants for the 6” and larger pots. Do the math to know how much potting mix you’ll need to fill all your pots. V = π (r 2 ) Volume = pi times (radius squared). Total up the sum for all your pots. Now, plant ‘em! Be sure to plant them down a bit from the top to allow for watering. And be sure when you fill the pots that you smoosh the potting mix into all the inside nooks and crannies of the corrugation. 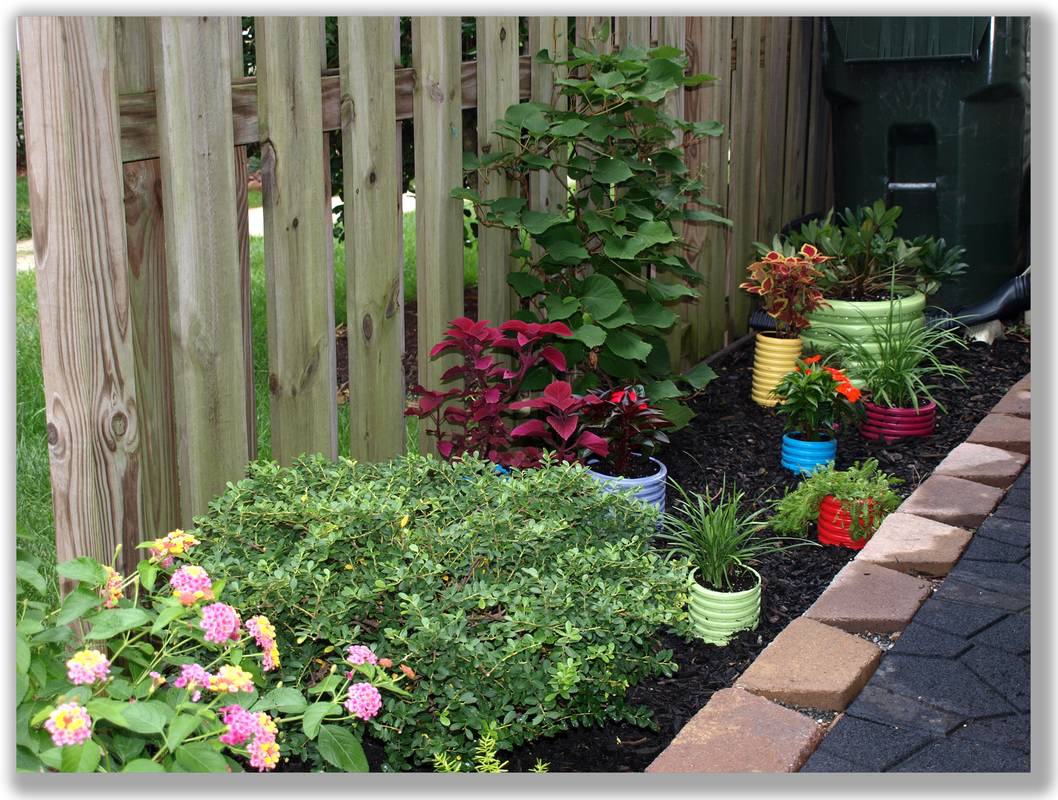 Another Finished View Of Our Back Patio Area Wasn’t that FUN?!
Thank You for visiting, — Chris P.s. How’d your project come out? What unique features did you incorporate? Where did you find sources of scrap drain pipe that others might also search out? What fun, unique plants did you use to make your garden project scream “YOU”!? Chris Fedderson — MacroFine Musings ~~~~~~~~~~~~~~~~~~~~~~~~~~~~~~~~~~ “ ‘Will you walk into my parlour?’ said the Spider to the photographer…” [ed. lic.] --Mary Howitt 1829 It’s been raining – no surprise here, it’s April and you know the adage: April Showers bring May Flowers. Even though we know the promised benefits, sometimes April seems to drag on and on while we wait to photograph the beautiful May Flowers. So, make good use of it. With all this rain comes an opportunity to look for new, challenging subjects to photograph. And I know just the thing! Spider webs! Eeewwww! No, Really. Even if actual spiders aren’t your thing, their webs can make some intriguing Macro shots. 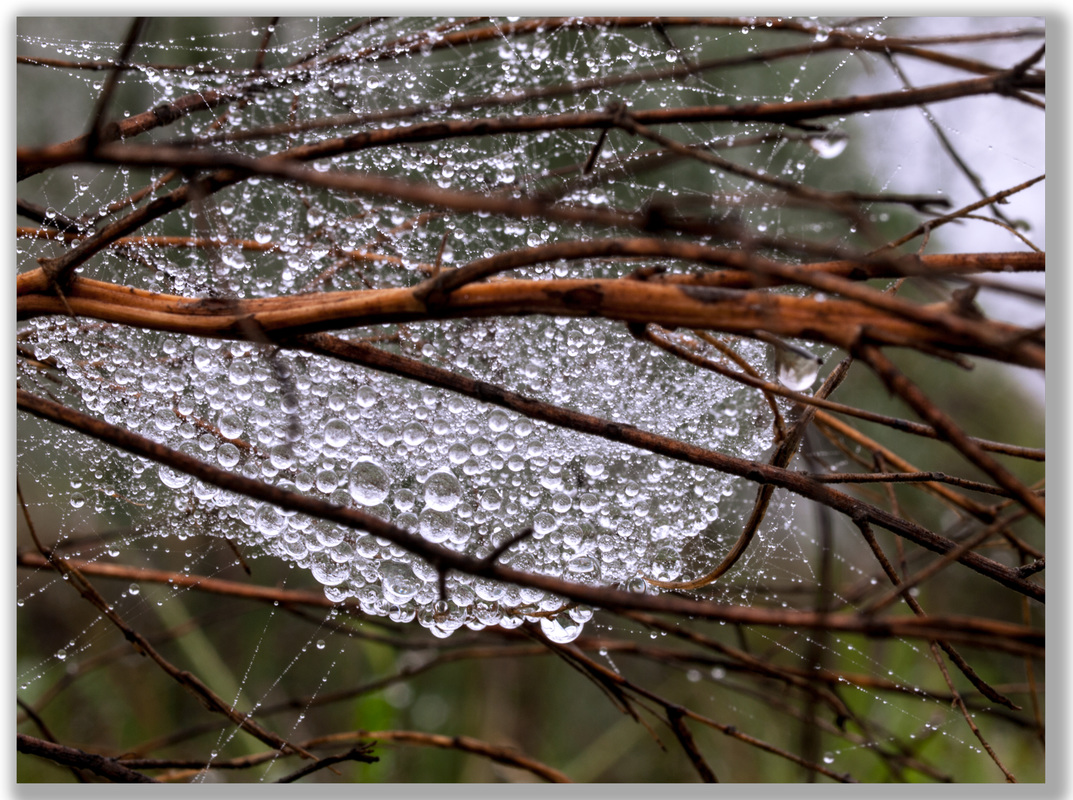 Diamonds Webs holding raindrops, or heavy with dew, can be fabulous subjects — they almost define your Hook for you. But they can be challenging subjects. Webs pose a whole host of fun challenges: movement, focal point, resolution, background, depth of field, refracted images, etc. But, overcoming these hurtles is all the fun! These engineering marvels have amazing strength and construction. “Markus Buehler, an associate professor of civil and environmental engineering (CEE) at MIT, has previously analyzed the complex, hierarchical structure of spider silk and its amazing strength — on a pound-for-pound basis, it’s stronger than steel.” … But, I digress… Your first challenge — chronologically, and the hardest one for me — is that you can’t get up at the crack of noon and wander out into the yard in your jammies thinking you’re going to snap a masterpiece before breakfast… er… lunch. You must plan ahead and choose your photo shoot location and timing with care. Choose a site that is home to a lot of spiders: a wetland, a remote meadow, any place that is also home to a lot of insects in general. Plan your timing to be early… very early… in the morning. You’ll also need a morning that follows a light night rain or a misty or foggy night. You need the water drops, after all. An added bonus may be that this morning will be overcast or foggy, providing an even, diffused light. Perfect! You will also need it to be beyond calm. You’ll need it to be windless. Just the fact of very early morning will help with this. Pack your Macro lens and your tripod. Don’t neglect the tripod; you need to be able to eliminate as much movement as possible. When you’re all set up and ready to shoot, remember that it takes only about three air molecules to move a web. Any wind you generate with breathing, body movements, and even the convection currents from your body heat, can jiggle your web. So, now you’re out in the field, scouting for a subject web. But not just any web. You want one that is pristine — or as pristine as it possible given that bugs have been crashing into it all night. You want a great background, and maybe some ancillary objects in the frame that will add to your image’s message. Maybe diffused color areas or a suggestion of something behind that adds emotion. Maybe the spider is in the shot. That could be a great message/hook. …Or not… 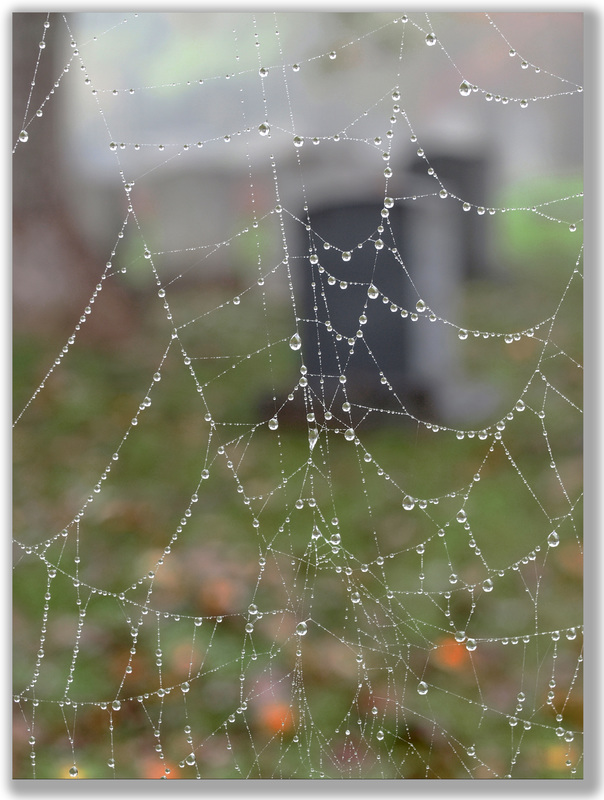 Somber Day You found it! Your National Geographic masterpiece subject. Carefully get as close as you can; set your tripod, being sure to not move the web thereby dislodging its watery cargo or breaking its structure. Fill your viewfinder with it. Consider your view angle, the direction of the lighting, the background, any ancillary objections within the frame, the presence — or not — of the spider, the emotional clarity and successful communication of your message, and anything else affecting your Artistic Statement. Whether you shoot for a very narrow depth of field or a very deep focused range, is entirely up to you — and your message. Either way, set your shutter speed to be as fast as possible while balancing it with the rest of the techy things, e.g., aperture, ISO, exposure compensation, desired amount of over- or under-exposure. This fast shutter speed will help to overcome any unavoidable web movement. 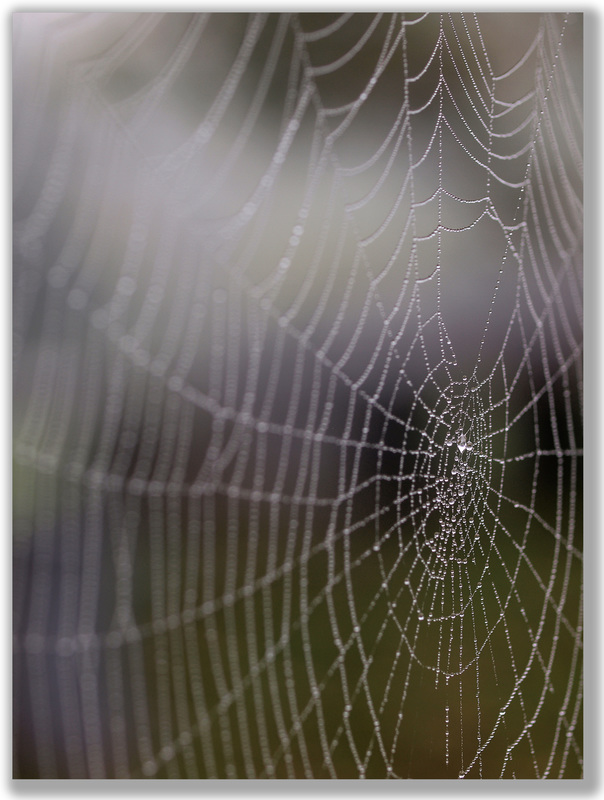 Eye of the Spider And just to complicate the whole deal… try using a flash. You may be able to get a lit and focused web while all else behind is vastly under-exposed and dark. Could be dramatic. Enjoy!
Thank You for visiting, — Chris P.s. How did it go for you? Did the early morning kill you? It did me! Have you tried various depths of field? Was the spider in your shot? What about using flash? Tell us what unusual things you tried on your photo shoot — we’d love to try them. |
Categories
All

About Chris
I am a Virginia-based photographer and gather my images while hiking in parks and natural areas here at home and in the locations I travel to. I also love to visit arboretums and botanic gardens to find unusual and exotic subjects. Archives
March 2017
|
 RSS Feed