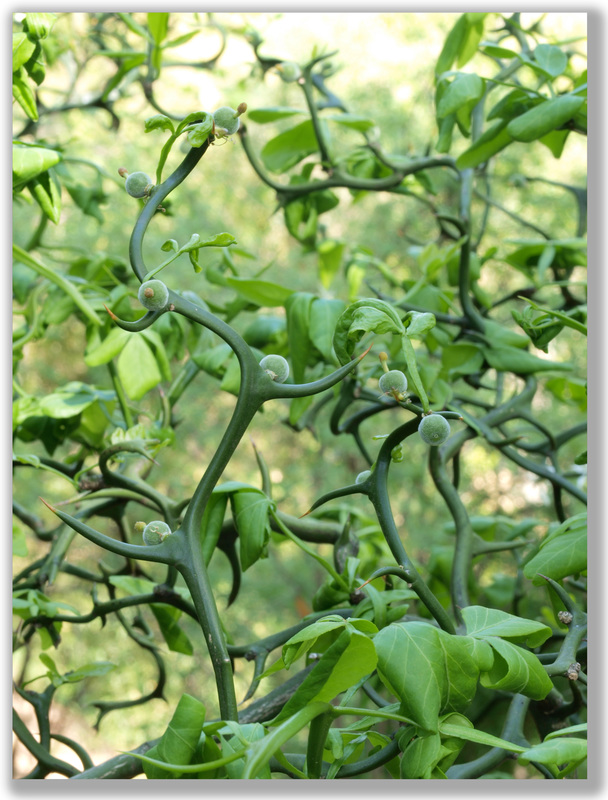
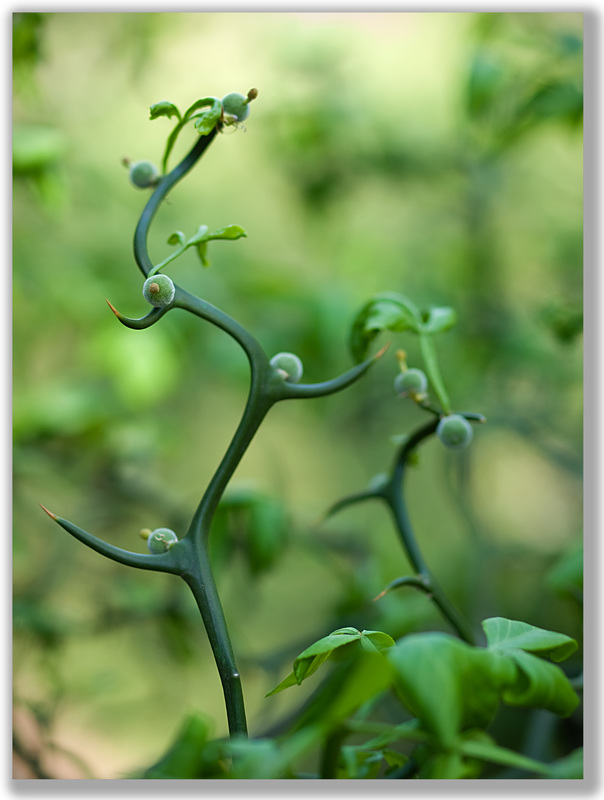
 Single Tear Single Tear Chris Fedderson — MacroFine Musings [This post is an elaboration on the first point I made in my post of November 10, 2015, Five ways to raise your photo IQ (Interest Quotient)] ~~~~~~~~~~~~~~~~~~~~~~~~~~~~~~~~~~~~~~ But focus you must! OK, so you have a visualization, including the hook. Your subject is pristine — no one wants a technically perfect picture of a raggedy butterfly. You have the lighting and composition perfect. Your color is balanced — chromatically and ‘geographically’ within the image. So shoot the image already, right? NO! You need to focus. Well, duh. But, it is more complicated than just that. You can’t just set your aperture at f/22 and use auto-focus and hope everything works out. More likely than not you don't want everything in focus. You might want just your hook in focus and the rest to be only ‘suggestions’ of imagery or background or backstory or supporting elements. In image #1 below, I saw a single twig that I wanted to feature. Clearly, at f/22, too much is in focus to allow the one twig to be accentuated; it gets lost in the jumble. However, as shown in #2, an aperture of f/2.0 blurs out all the extraneous distractions so we can now clearly see what The Point Is.
You achieve this selected focus by employing your aperture control to regulate your depth of field. I’m not going to ‘go all techy on this’, but suffice to know:
Experiment. Using a tripod, beanbag, or some other means to be hands-free with your camera and with your smallest f/number (maybe f/2.0), manual focus on an object at a short distance away. Snap the shot. You might have (just pulling examples out of my hat) things between 4.0 to 4.5 feet away in focus and everything else, closer and farther away, in graduated out-of-focus-ness. Now don’t touch anything! Change only your f/number to your largest (maybe f/22). Snap the shot. Now you might have everything from 2 feet to 20 feet in focus and things closer than 2 feet and farther than 20 feet in graduated out-of-focus-ness.
Now — again, without changing anything but the aperture — do all the (major) f/stops, i.e., 2.0, 2.8, 4.0, 5.6, 8.0, 11, 16, 22 and see the depth of field gradually change. Now do it again focusing at maybe 15 feet away. Now memorize all these results. Memorize all these results?! Are you crazy?! No! Yes! No! I mean, don’t memorize them, just pay attention to the general results. With time, attention, and hundreds of experimental shots, you’ll start to get a ‘feeling’ for which settings are close to what will give your hook the attention it deserves. Then you just shoot a variety of shots so —maybe— one will be your intended image. In doing this, you will continue to hone and refine your skill, and ultimately you’ll need to shoot fewer ‘maybes’. So you did all this and your hook is still not focused correctly. There are a several reasons this might be happening.
I can’t help you with motion blur, except to say possibly a faster shutter will solve the problem — but then you change up your aperture and hence the depth of field and maybe there goes your hook and you get all distraught and you never come out of the house again and you quit using personal hygiene and all your friends and spouse abandon you… Whoa, hold on there, Chief, it’s not that bad. Just move on to your next hook. There are literally (and I do mean literally!) infinity times infinity hooks out there. Go get one! Now, camera shake I can do something about! Phfwew! See, that wasn’t so bad. The solution? Stop hand-holding your camera. Simple as that. Get a tripod. Don’t have, or unable to get, a tripod? Try using a beanbag and set your camera on top of a rock or fence post or your car hood or the ground or any other thing in the universe that is not moving. Don’t have a bean bag? Make one out of one of your socks and small pebbles. OK, that was dumb. But make one out of an old sock and some dried beans. Or use your camera bag or purse to prop your camera on — be sure it is secure and won’t tilt off and fall. Bummer. Add in the use of your in-camera shutter release timer or a cable shutter release and you are all set to be jiggle-free.
The issue with auto focus is the easiest to remedy… just use manual focus. I will use auto focus to find my point and to get a rough… let me repeat… rough focus, and then I’ll manually tune it in from there. Even if auto focus seems to have worked perfectly, it will refocus again with each shutter release and there-in lies great potential for miss-focusing.
Remember that you are not focusing on a thing but rather you are focusing on a distance from your camera. Any subject that comes into, or goes out of, that distance will come into, or go out of, focus. And, any thing that changes the relationship of your hook to that distance will alter the ‘total-focal-effect’* (I just made that up!) within your image. You may still have razor sharp focus — just on the wrong element in your image — or you may have generalized blur from movement of the subject or the camera. Sometimes whatever went wrong can be corrected, sometimes not. Experiment to learn what you can control, and when you cannot, move on to your next stunning image. Thank You for visiting, — Chris P.s. * Total-focal-effect: all the aesthetics, impressions, feelings, emotions, points-of-attention, appreciation, etc., derived, en masse, from the collective effects of in-focus and out-of-focus areas and elements within an image. So what do you think? Is this focus-thing clear to you? Do you have a sharp understanding of it? Or is it still a little blurry? Do you want more depth? Or would you rather stay soft on the matter? If I’ve not been well-defined on something please do send a comment and I’ll see if I can bring it into focus!
0 Comments
Leave a Reply. |
Categories
All

About Chris
I am a Virginia-based photographer and gather my images while hiking in parks and natural areas here at home and in the locations I travel to. I also love to visit arboretums and botanic gardens to find unusual and exotic subjects. Archives
March 2017
|
 RSS Feed